Showing posts with label craft. Show all posts

Tuesday, February 7, 2012

I HEART YOU PINTEREST

Pinterest...what was life like before this incredible gift? I'm totally addicted and if they had AA for Pinterest, I would nominate myself as the door holder for every meeting. 


I was feeling bold and "heartfelt" tonight, so I decided to do my Valentine's Day gift for my little darlings.


This is what I saw on Pinterest. I said to myself "Hey you can totally do this. It's so simple," and self said back "You got it kid. No problem." Well self was half right..half wrong.


I grabbed my crayons, knife, and cutting board and was ready to SLICE. Right after I put the camera down I had a "HELLO LADY!" moment. Uhhh, Tanya you have to take off the wrapping. OH. For some strange reason that step never crossed my mind. Its as if my prior knowledge on crayons strictly remembered seeing only "naked" crayons. So weird. After I got over my stupidity, I started peeling. WOW. Peeling wrapping off of crayons with nails = NOT A GOOD TIME. I still have crayon under my nails and this was a few hours ago. At first I tried doing it the dainty, girly way but after crayon #2 I was tearing into that thing like a lion who hadn't eaten in 7 days. (Of course this simile is not to be confused with me tearing into the crayon with my teeth but more WITH MY NAILS.)

After some time...no more than 40 minutes...this is what I had. 


I got the molds from Target. Target you are the glue that holds my life together.

There were so many questions during this endeavor....

"Should I cut the crayons into smaller pieces?"
"Should I cut the crayons into bigger pieces?"
"What colors would work the best?"
"Will I ever get the crayon out from under my nails?"
"Why do crayons have a weird texture/feeling to them?"
"I should have tried a recipe from Pinterest instead of a craft on a school night!"

The last sentence wasn't a question, but more a statement I pondered quite a few times...

I popped my little hearts into the oven at 250 degrees for 15 minutes.
13 minutes in, my oven started to produce an INTERESTING smell. 
Highlight of the night: "EW. I'm not eating whatever you have in the oven." - Mark (he missed the whole chopping crayons up bit and had no idea what I was doing in the kitchen. Oh to be a man and oblivious to life.) 


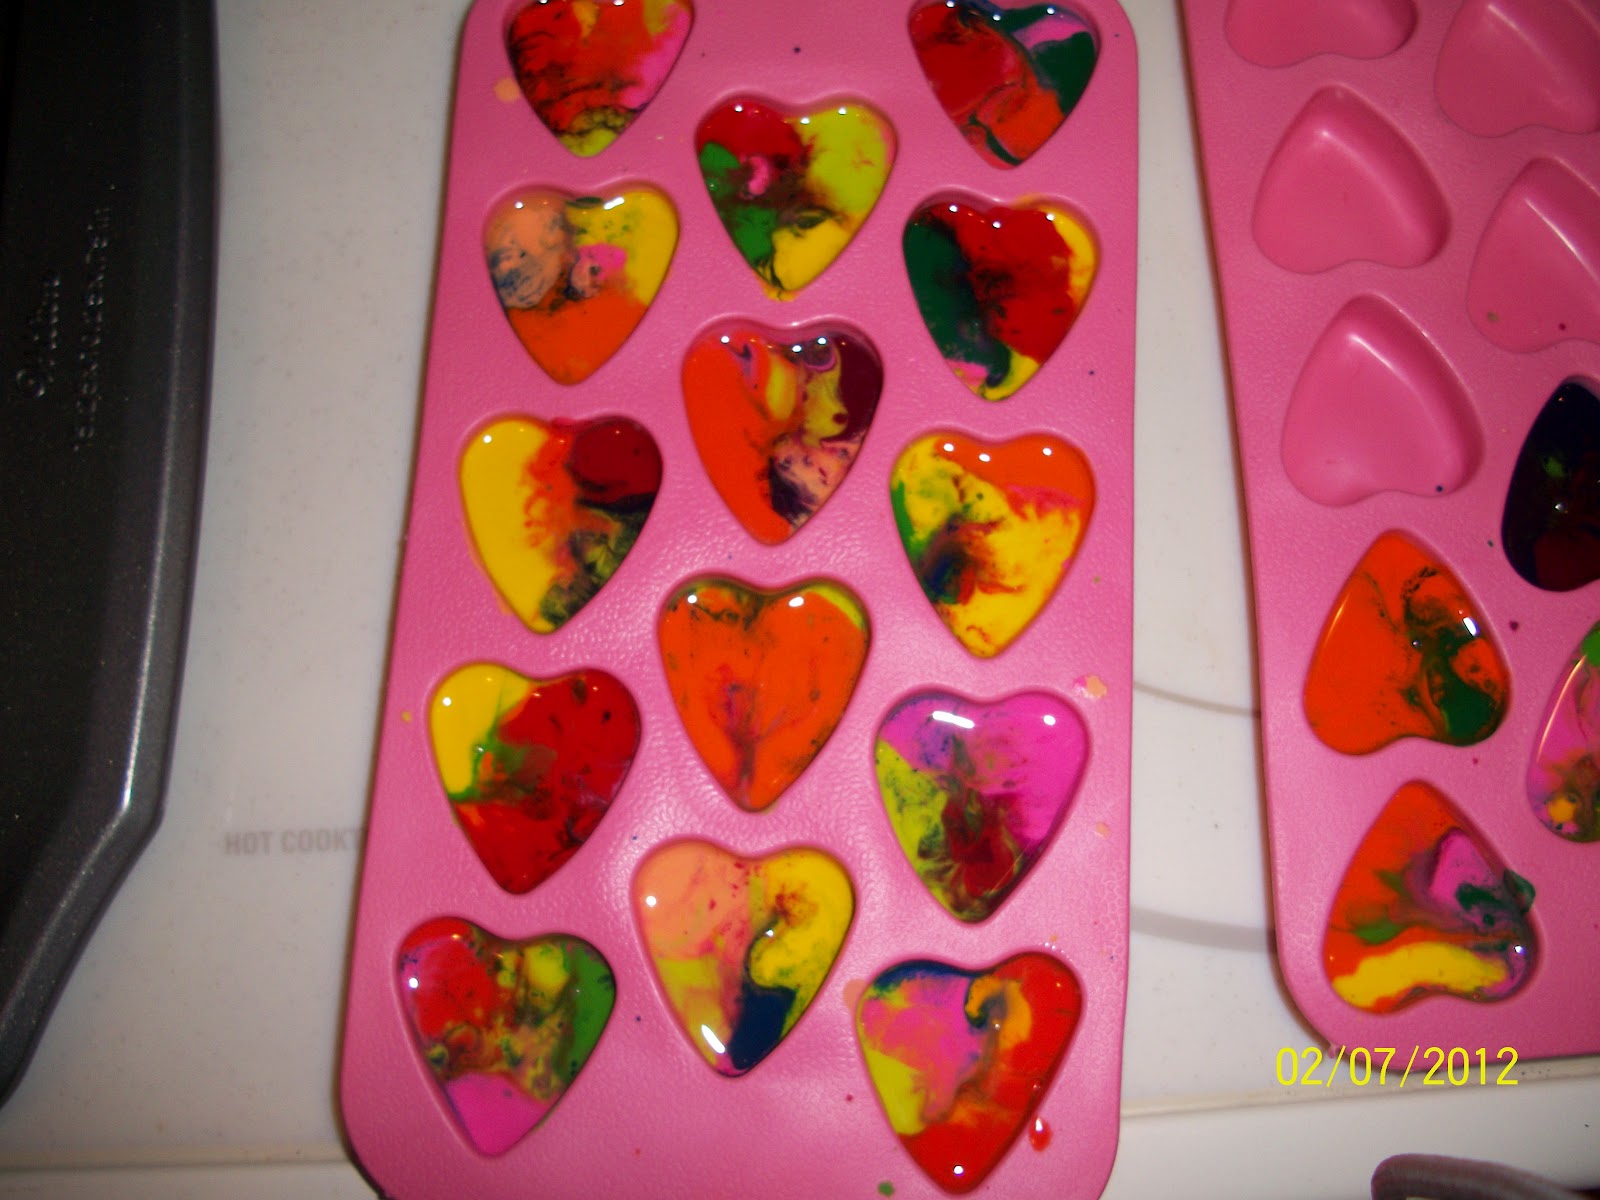
This is what they looked like when I took them out of the oven. I let them cool completely and then the popping started! 

Finished product:


LOVE. LOVE. LOVE. So worth it!! I know my kiddos will love them, and thanks to this craft, I now have built-in crayons under my nails. Go me. 

Off to go work on the template which the heart will sit on and to snuggle with Penny. :) 


Wednesday, December 21, 2011

O Christmas Tree, O Christmas Tree

Remember the pine cone craft I mentioned earlier in the month? Well last Monday we started this craft and it exceeded any expectations I had.


After employing Mark to help finish cutting those Mardi Gras necklaces, we finally had everything ready to start. First on our list..we had to paint the pine cones green. I made sure to have newspaper on hand to cover every inch of the students' desks and floors. When I announced that we would be using paint, the children's eyes enlarged. "But Ms. V you HATE paint," they all exclaimed. I don't loathe paint.... well only if it gets on my carpet and stains my desks, but who's watching for all that?


They swore up and down that they would keep the paint on the newspaper and pine cones and they did a great job doing so.


This is what the pine cones looked like during the painting process...


So after painting them, we let them dry. Of course my kiddos were restless during this step. They were DYING to put the "ornaments" on the tree. So after a snack break, we hit the ground running. Each group got 5 bowls containing the different colored beads and a bowl of Tacky Glue (A STAPLE FOR ANY CLASSROOM). It comes in a gold bottle and it's awesome!


Naturally my students suffer from "Too Much Glue" syndrome, which shows in the pictures below but after a night of drying, the glue turned clear.


After 40 minutes, the trees looked BEAUTIFUL. I was so thrilled!


Please excuse the orange mini Post Its. They are not part of the Christmas decor, they simply have the students' names on them to prevent confusion.


Aren't these trees charming? I really fell in love with this craft.


Here is a video too because I felt as though the pictures were not doing justice for these amazing Christmas trees....


Lastly, we took blank CD's and hot glued them to the bottom of the trees to make a tree skirt and glued mini present ornaments on the skirt.


Finished products:


I will for sure do this craft next year. It was relatively inexpensive and a lot of fun. :)


Well I'm off to get some cleaning done. Take care.

Sunday, December 4, 2011

Pine Cones, Beads, and Carpal Tunnel

Of course like any teacher I have thought and thought about what to do for my parents for Christmas. In the past I have done wooden ornaments where the students paint them but I wanted to try something new this year. I have a great group of parents and they have gone above and beyond this year for me so I wanted to do the same for them.


I found this cool idea online where you paint pine cones and make them into mini Christmas trees. My first mission was to find pine cones...OK...no problem I thought. I went on ebay (my portal for all things teaching) and found pine cones instantly; however most sellers wanted $30.00+ dollars plus $10 shipping and handling. For pine cones? Something that fell off a tree and you picked up? OK...option B....employ my students and parents. I teach in DeSoto county, which is a very rural area. I don't live there but I knew several of my children lived on acres and acres of land. The first day one of my girls brought in a GIANT bag of pine cones (SCORE! YES!). Unfortunately, they were all closed. OK...no problem..I turned to google....my second portal for all things teaching. I found several websites that said you can put the pine cones in the oven at 200 degrees for 30 minutes and they would open. So that night I took the bag home (which of course opened up and fell all over the trunk of my car on the ride home) and followed the directions of the website. Did they open? NO..nothing happened. Well actually, something did happen...instead they BURNED and produced this interesting smell of pine cone and burnt pizza (dinner we had the night before). Thankfully, two days later that same fabulous student brought in a bag of OPENED pine cones for our entire class.


List of Needed Materials:
Pine Cones
Beads
Paint
Glitter
Glue


Beads...I did find a good price for these on eBay. I ordered 5 dozen of the Mardi Gras necklaces for $11.00 (including shipping). So today I decided to tackle the cutting of these dozens of necklaces. For the craft you use the beads as ornaments for your pine cone tree. I have 5 different colors of necklaces and I have only made it through 2 colors. My wrist feels as though it is about to fall off. Below are some pictures...


Of course Penny had to make an appearance. Every time you sit on the floor she thinks you want to throw her charming rope toy..it's all about her, you know. :)

I think I'm done cutting for today. I still have another week before we start this craft..thank goodness. :)